It has long been a goal of mine to distribute temperature and humidity sensors around the house and track that data over time. Part of the reason is practical, to identify outliers and adjust things to be more consistent; part of it is because I just like having all the data. Several years ago, I tried using some Bluetooth Low Energy (BLE) sensors I bought online, but the “short range” inherent in BLE was quite short range. Although I create a Python project to collect the data, I gave up pretty quickly due to the range issue.
Fast-forward to today: we’ve moved to a new house, with more space and more need to track things. While 5 years ago the wifi-enabled sensors I looked at were far too expensive to be practical, I figured with the passage of time and Moore’s Law there would be some new options to play around with. A quick Reddit search pointed me to the ESP32 platform and the BME280 temperature/humidity/pressure sensor, which immediately seemed promising: wifi, easy to configure, and inexpensive. I decided to give it a go, and much to my surprise it took just over an hour to get a functioning sensor on my network! In this blog post I’ll share how I got up and running.
Buying the components
The ESP32 board I got was this one from Amazon. The cost is only $20 for 3, a pretty amazing price when you think about it. For the BME280 sensor, I got this Waveshare device for about $12. That means all in, it’s less than $20 for a single sensor, which is quite cheap compared to the other ones I was looking at.
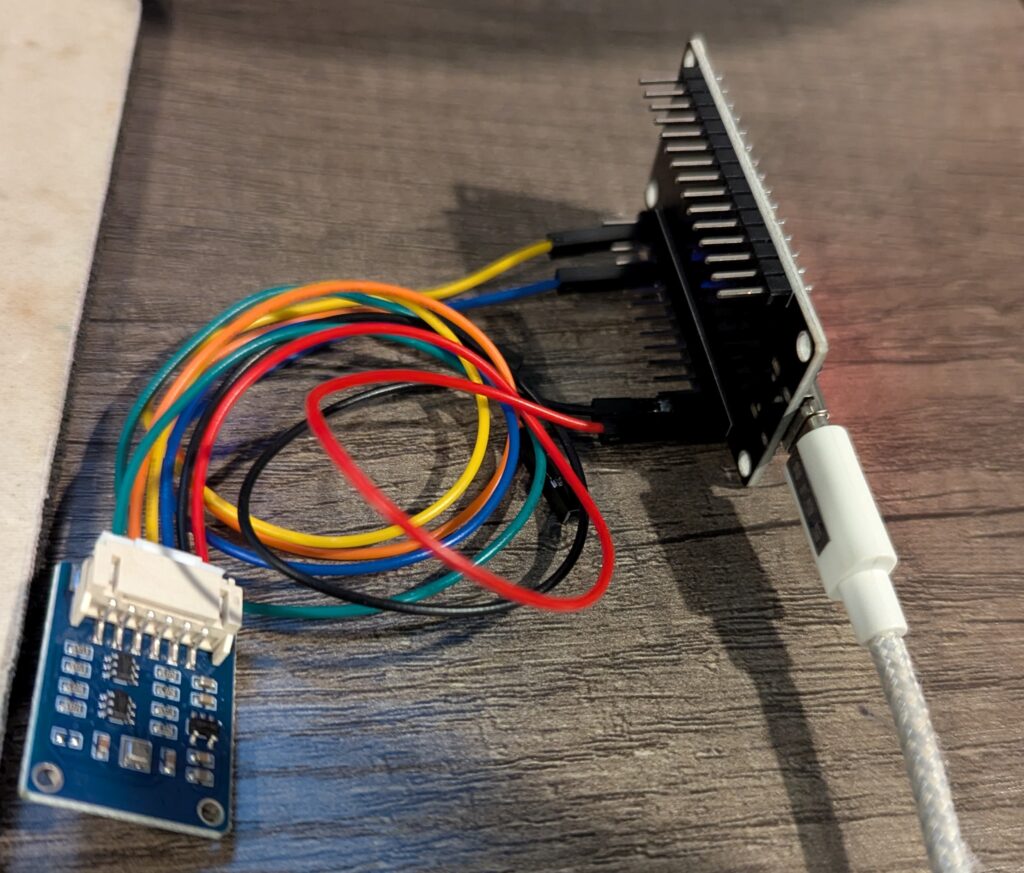
Physically assembling it was simple: following this tutorial, I connected the power and ground pins, as well as the clock and data pins to the two GPIO pins on the board. When that was done, I moved onto the next step: configuration.
Setup
To get things up and running as quickly as possible, I used the ESPHome project. I installed it using PIP and soon enough I allegedly had the right EXE file…somewhere. Tracking it down due to how Windows saves Python apps was an adventure, but I eventually found it in “C:\Users\username\AppData\Local\Packages\PythonSoftwareFoundation.Python.3.12_qbz5n2kfra8p0\LocalCache\local-packages\Python312\Scripts”. Such an obvious place.
From there, I followed yet another tutorial to get a basic YAML config file set up for the sensor. I configured the wifi, and then added the I2C and sensor configurations as appropriate:
i2c:
  sda: GPIO21
  scl: GPIO22
  scan: true
  id: bus_a

sensor:
  - platform: bme280_i2c
    temperature:
      name: "Main Bedroom Temperature"
    pressure:
      name: "Main Bedroom Pressure"
    humidity:
      name: "Main Bedroom Humidity"
Next was to run the “esphome run” command, and here I ran into my first problem: figuring out what board I had. Of course, the one I bought wasn’t listed, but it was shown as WROOM32 and so I went with “denky32” as the closest match, which seemed to work just fine.
That took me to my next problem: after plugging it in and selected the USB-SERIAL connection, I kept on getting connection failed errors due to “Wrong boot mode detected (0x13)!” This one took a bit longer to track down, but I eventually learned that I had to put the chip into download mode by pressing the only two buttons on the chip (BOOT and EN) at the same time when doing the flash. Finally, after several tries, it flashed successfully!
You’ve got data!
Board flashed, I eagerly awaited some word that it was working as intended. It didn’t take long at all to see that the sensor was detected and sending information:
[16:53:40][D][sensor:094]: 'Main Bedroom Temperature': Sending state 22.68312 °C with 1 decimals of accuracy
[16:53:40][D][sensor:094]: 'Main Bedroom Pressure': Sending state 985.91486 hPa with 1 decimals of accuracy
[16:53:40][D][sensor:094]: 'Main Bedroom Humidity': Sending state 40.07617 % with 1 decimals of accuracy
The logs also showed that the device was connected to wifi, which I confirmed in my own DHCP logs. After little more than an hour, I had a working sensor! It didn’t look pretty, but it did the job.

Next steps
OK, so I had a sensor, but where was that data going to go? Ultimately, as with every other log I use, I wanted to get the data into Elastic so I could query it and show dashboards. So far, I had the data, but I was missing a step. Enter Home Assistant, and in the next blog I’ll show how I got that data into Home Assistant and then into Elastic using their API. Until next time!

1 comment